SSO Configuration
Overview
Single Sign-On is a feature integrated into the i2i platform using Security Assertion Markup Language 2.0 (SAML 2.0) that allows your IT Team to manage and control your user’s access to the i2i platform if you have an existing SSO iDP already setup.
This gives the company better control over who uses the i2i platform as well as making accessing easier for their users.
The i2i Support team will liaise with your IT Team to setup and integrate SSO on your iDP in a timely manner.
If you would like to setup SSO please contact your Account Manager.
Azure SSO Configuration
Intertek Inform’s i2i supports Azure Active Directory single sign on via SAML 2.0, which is available on Microsoft Azure Cloud. For general questions about SAML support, you may find this guide helpful. Don’t worry if any of the fields below are different than your default claims. You can use transform rules inside of Active Directory to make sure the right format is sent back to i2i. We’ve written this guide using the most likely defaults, so don’t panic if your configuration looks slightly different.
Preparation
We will set up a custom “Enterprise Application” using SAML 2.0.
- Click on Azure Active Directory
- Click “Enterprise Applications”
- Click “New application”
- Click “Create your own application”
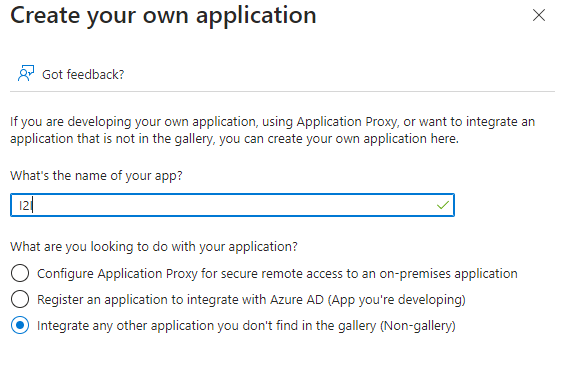
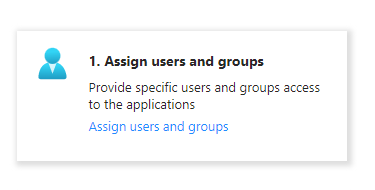
Step 1: Application Setup
Click on “Assign users and groups” and assign the relevent users and groups based on your business organisation.
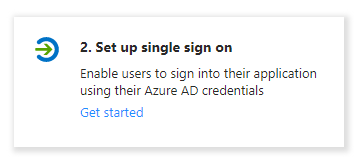
Step 2: Application Setup
Click on “Set up single sign on”
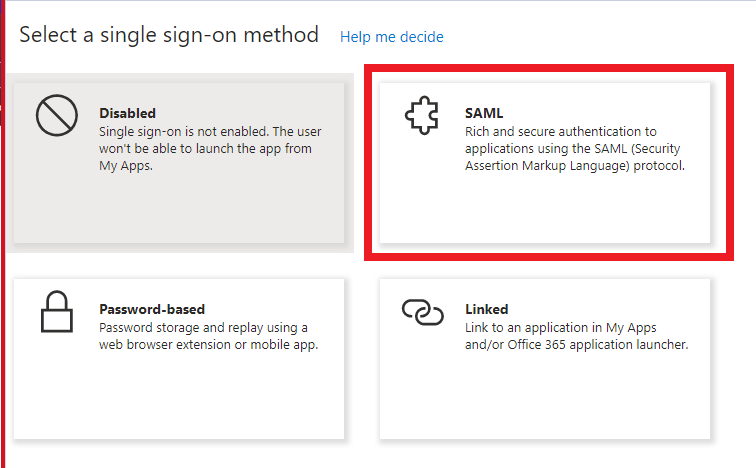
Select “SAML” sign-on method
Basic SAML Configuration
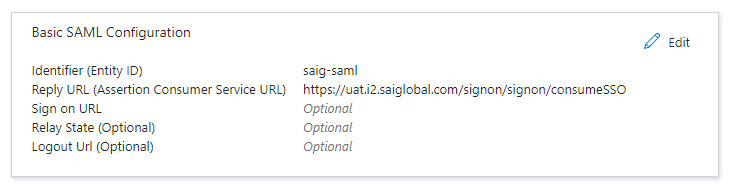
- Identifier (Entity Id): saig-saml
- Reply URL(Non-Prod):
- /signon/signon/consumeSSO (Default)
- https://au.uat.i2.saiglobal.com/signon/signon/consumeSSO
- https://eu.uat.i2.saiglobal.com/signon/signon/consumeSSO
- https://us.uat.i2.saiglobal.com/signon/signon/consumeSSO
- Reply URL(Prod)
- https://i2.saiglobal.com/signon/signon/consumeSSO (Default)
- https://au.i2.saiglobal.com/signon/signon/consumeSSO
- https://eu.i2.saiglobal.com/signon/signon/consumeSSO
- https://us.i2.saiglobal.com/signon/signon/consumeSSO
Attributes & Claims
Click the “Edit” button on “Attributes & Claims”
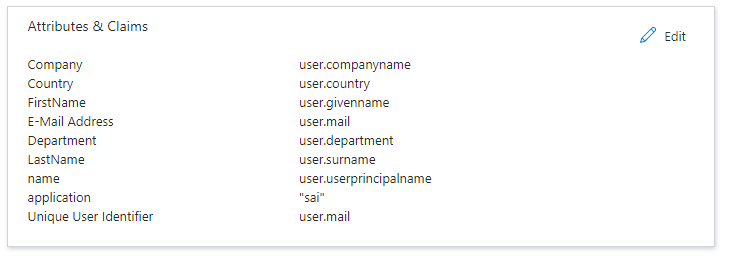
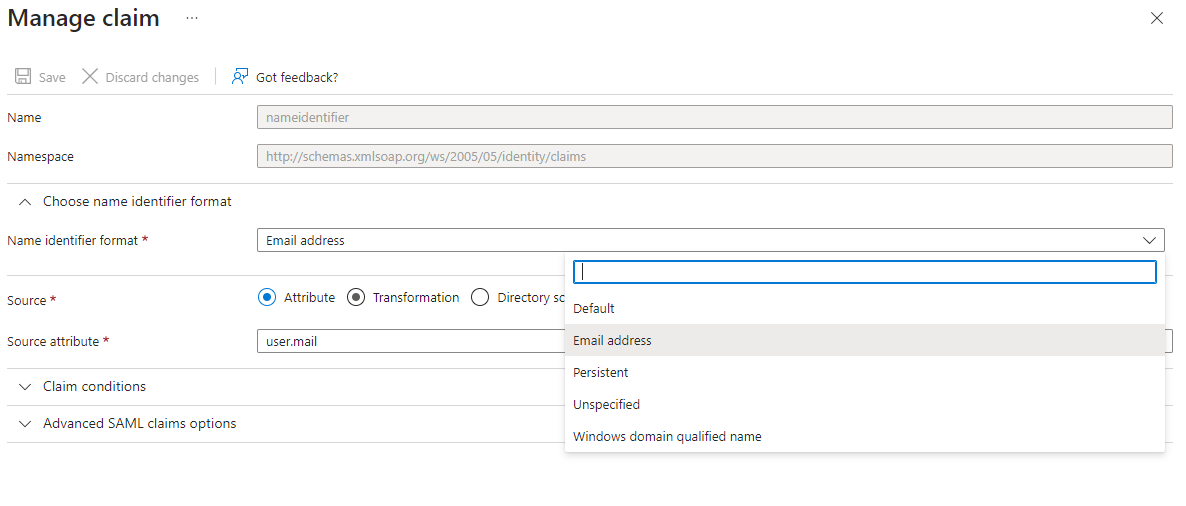
Configure “Unique User Identifier (Name ID) to user “Email address”
Map the additional claims as per screenshot
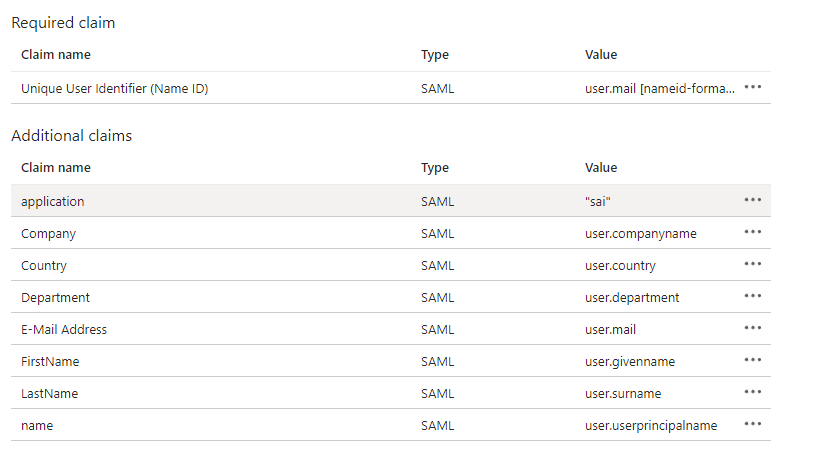
Add appliation claim with constant value
- Click “Add new claim”
- Set “Name” to “application”
- Set “Source attribute” to “sai”
Step 3: Send configuration to i2i support team
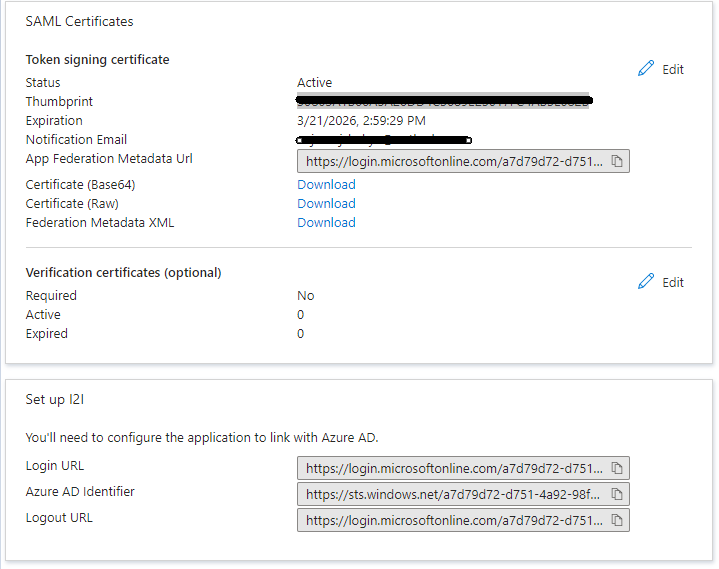
- Download “Certificate(Base64)”
- Copy “Login URL” and provide it as “Issuer URL”
- Copy “Azure AD Identifier” and provide it as “Responders URL”
- Copy “Thumbprint” and provide it as “Fingerprint”
Step 4: Support will configure SSO on i2i
Once the support team has configured the SSO you can use the URLs below to test the integration.
Non-Prod URL:
TEST: /signon/signon/testSSOlogin/[domain]
LIVE: /signon/signon/ssologin/[domain]
Prod URL:
TEST: https://i2.saiglobal.com/signon/signon/testSSOlogin/[domain]
LIVE: https://i2.saiglobal.com/signon/signon/ssologin/[domain]
Note:
The “TEST” URLs only shows the SAML attribute mapping for debug purpose.
The “LIVE” URLs allow the user to login.
ADSF SSO Configuration
Intertek Inform’s i2i supports ADFS (Active Directory) single sign on via SAML 2.0, which is available on ADFS version 2.0 and above. For general questions about SAML support, you may find this guide helpful. Don’t worry if any of the fields below are different than your default ADFS claims. You can use transform rules inside of ADFS to make sure the right format is sent back to i2i. We’ve written this guide using the most likely defaults, so don’t panic if your configuration looks slightly different.
Preparation
We will set up ADFS as a “Custom” type. Based on defaults for ADFS installs, the configuration options in i2i should be:
- SAML SSO URL: https://[yourdomain.com]/adfs/ls/
- Identity Provider Issuer: http://[yourdomain]/adfs/services/trust
You can confirm your server’s Federation Service Properties by right clicking the “Services” folder on ADFS, then “Edit Federation Service Properties”. If you do not see this option, make sure you’re on ADFS version 2.0 or higher, as ADFS 1.0 does not support SAML 2.0.
Check your Issuer URL
Make sure to confirm your ADFS server’s Issuer URL, since some will send http://[yourdomain] instead of https://[yourdomain]. If this is different from the configuration set in i2i, we won’t be able to match incoming requests to your account. You can fix this by updating the URL in i2i to match the actual issuer sent by your identity provider.
This guide will walk you through how to get the certificate from ADFS a bit later, for now you will need to expand Advanced Options and update two fields:
- Uncheck Encrypt Assertion
- Make sure to check “Windows” under Auth Context. You may leave “Password Protected Transport” enabled as well.
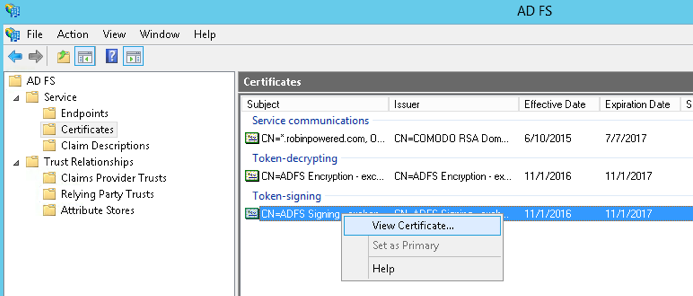
Copy Certificate
- Via the AD FS management console, go to Service > Certificates, right click and select View Certificate.
- Under the Details tab, select Copy to File to begin the export wizard.
- Select Base-64 encoded X.509 (.CER), then choose a location to save your certificate. Skip through the rest of the wizard’s defaults by clicking Next or OK until complete.
- Copy the contents of the certificate file you just created, and send it to i2i
SSO Configuration
We’ll use the AD FS management console to first add a new Relying Party Trust for i2i, then update the claims to include user attributes required for successfully SAML authentication.
Adding i2i as a Relying Party Trust
- From the AD FS management console’s Actions panel, select Add Relying Party Trust to open the set up wizard.
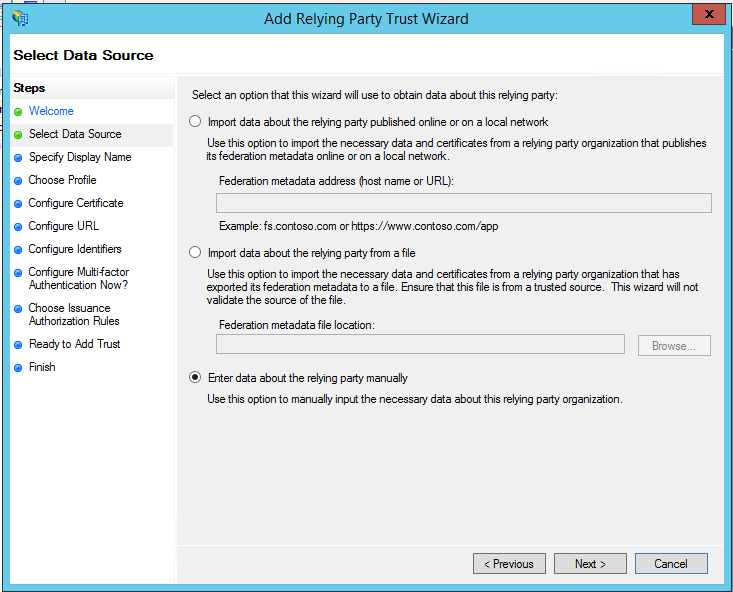
- Select Enter data about the relying party manually.
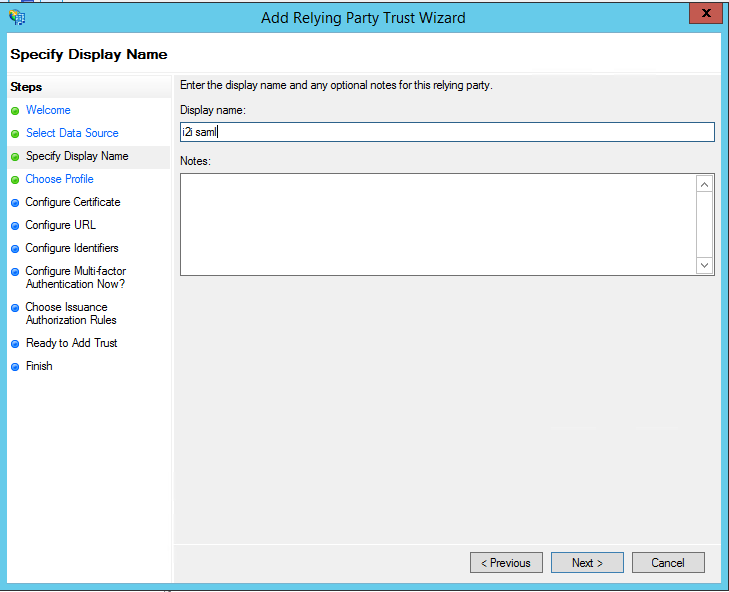
- Add a display name you’ll recognize, like “i2i” or “i2i SAML”, then click Next.
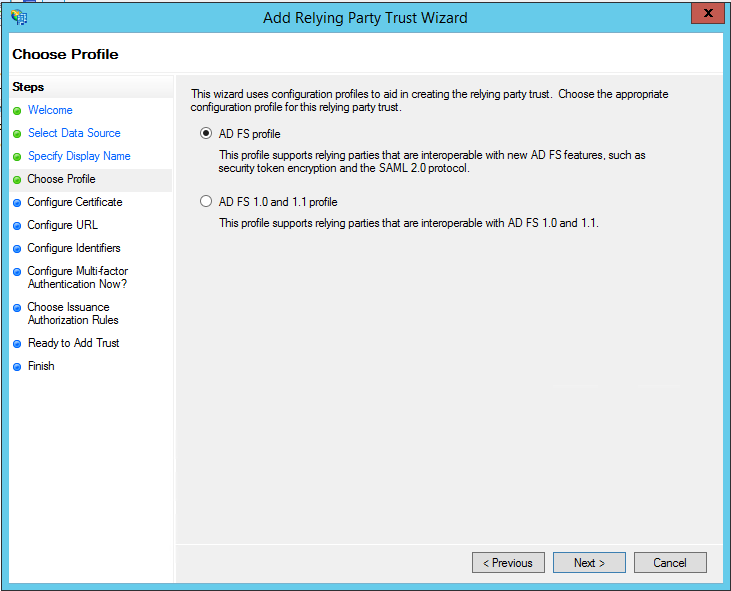
- Select AD FS Profile, and then skip the next step. We will not need token encryption for this set up.
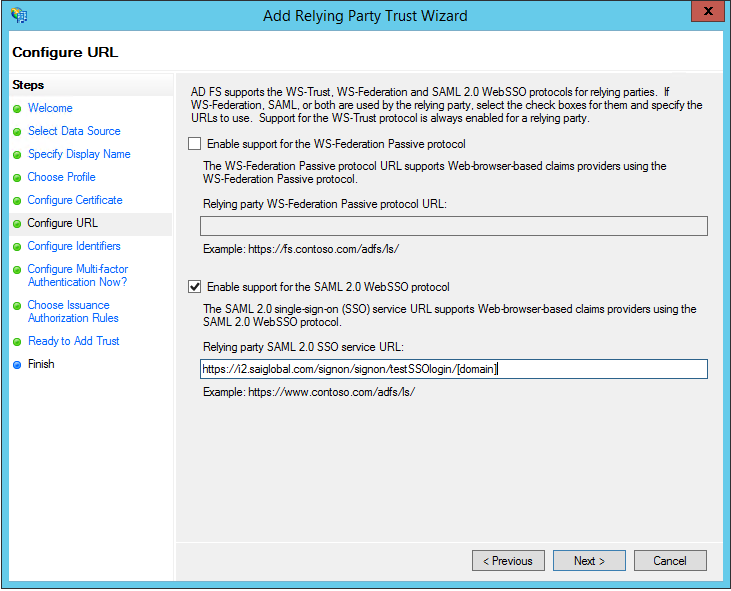
- Select Enable support for the SAML 2.0 WebSSO protocol and enter either TEST or LIVE as the relying party URL.
- TEST: https://i2.saiglobal.com/signon/signon/testSSOlogin/[domain]
- LIVE: https://i2.saiglobal.com/signon/signon/consumeSSO
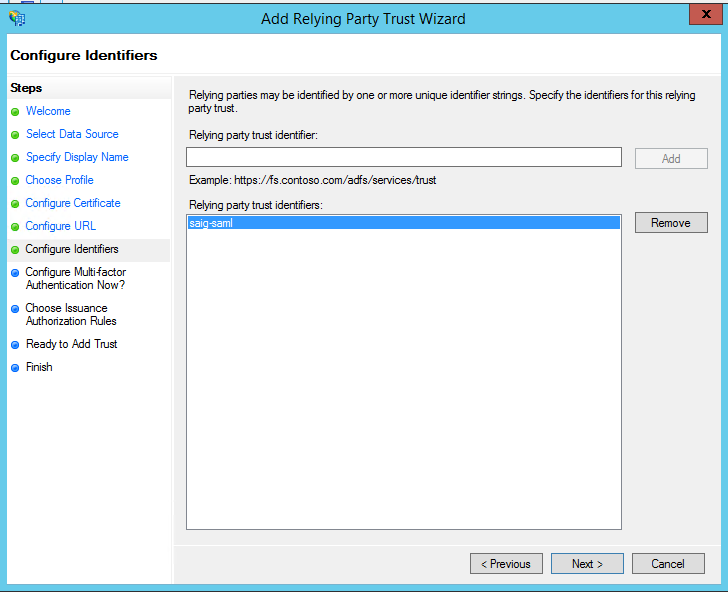
- Enter “saig-saml” as the Entity ID.
- Select Permit all users to access this relying party.
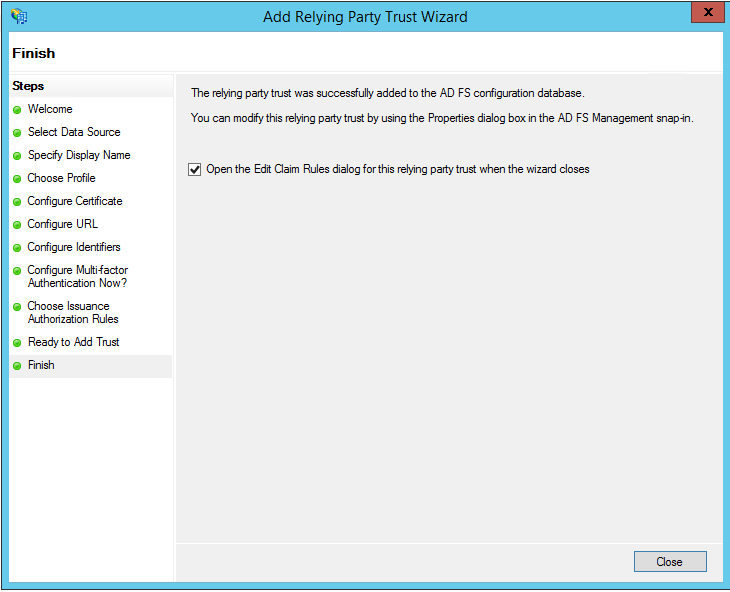
- Once you’ve confirmed the settings are correct, you can save and close the wizard. With the trust for i2i created in AD, we’ll need to update claims before connecting via SAML.
Adding Claims
User Attributes
- Right click the trust created in the last section, and select Properties.
- Under the Advanced tab, confirm the signature algorithm is set to SHA-256. Close the window when you’re done.
- Right click the trust created for i2i again, and select Edit Claims.
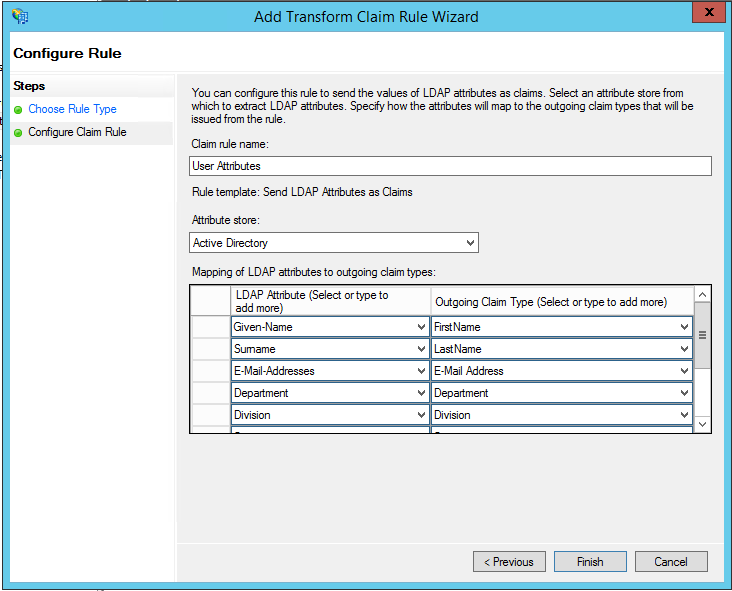
- In the new window, open the Issuance Transform Rules tab and click Add Rule > Send LDAP Attributes as Claims
- Enter a Claim rule name you’ll recognize (e.g. “i2i SAML Attributes”) and set Attribute store to Active Directory. Map the LDAP attributes to the Outgoing Claim Types listed below, keeping in mind that yours may be different (e.g. you may have email addresses stored in a different attribute).
- The outgoing claim types for i2i are case-sensitive:
a. Given-Name (LDAP) > “FirstName” (Outgoing Claim Type)
b. Surname > “LastName”
c. E-Mail-Addresses > “E-Mail Address” (or whichever field you use for email)
d. Department > “Department”
e. Division > “Division”
f. Company > “Company”
g. co > “Country”
h. application > “sai”

Confirm the claims are set up properly by clicking “View Rule Language”, where you should see something like this:
c:[Type == “http://schemas.microsoft.com/ws/2008/06/identity/claims/windowsaccountname”, Issuer == “AD AUTHORITY”]
=> issue(store = “Active Directory”, types = (“FirstName”, “LastName”, “http://schemas.xmlsoap.org/ws/2005/05/identity/claims/emailaddress”, “Division”, “Company”, “Country”, “http://schemas.xmlsoap.org/ws/2005/05/identity/claims/emailaddress”), query = “;givenName,sn,mail,Division,company,co,application;{0}”, param = c.Value);
NameID Transform
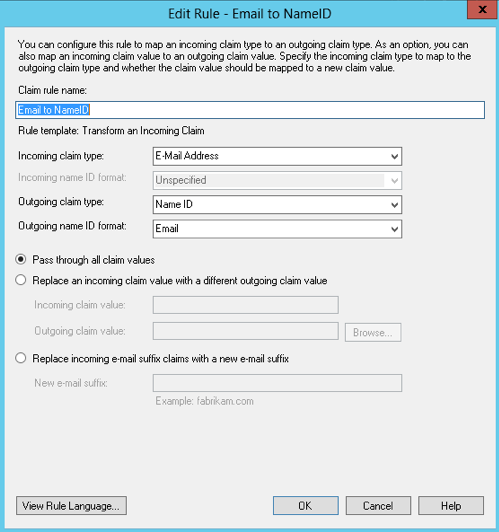
- Click “OK” to close the current window, then Add Rule > Transform an Incoming Claim.
- Name this rule something like “i2i Name ID Transform” for easy reference, then update the following fields:
a. Incoming claim type: E-Mail Address
b. Outgoing claim type: Name ID
c. Outgoing Name ID format: Email
d. Enable Pass through all claim values
View Rule Language should now look like this:
c:[Type == “http://schemas.xmlsoap.org/ws/2005/05/identity/claims/emailaddress”]=> issue(Type = “http://schemas.xmlsoap.org/ws/2005/05/identity/claims/nameidentifier”, Issuer = c.Issuer, OriginalIssuer = c.OriginalIssuer, Value = c.Value, ValueType = c.ValueType, Properties[“http://schemas.xmlsoap.org/ws/2005/05/identity/claimproperties/format”] = “urn:oasis:names:tc:SAML:1.1:nameid-format:emailAddress”);
Signing Message and Assertion
A PowerShell command can be used to make the SAML Message and Assertion signing configuration change. This will place a signature element near the top of the SAML response. By default ADFS only signs the assertion.
Set-ADFSRelyingPartyTrust -TargetName MyRP -SamlResponseSignature “MessageAndAssertion”
See: https://docs.microsoft.com/en-us/powershell/module/adfs/set-adfsrelyingpartytrust?view=win10-ps
Troubleshooting
If you’ve completed the steps above and still get errors, check the ADFS logs under Event Viewer. Your configuration may be different, and the Event Viewer is the fastest way to see details about the error shown to i2i. We have a complete guide for ADFS log hunting available here.
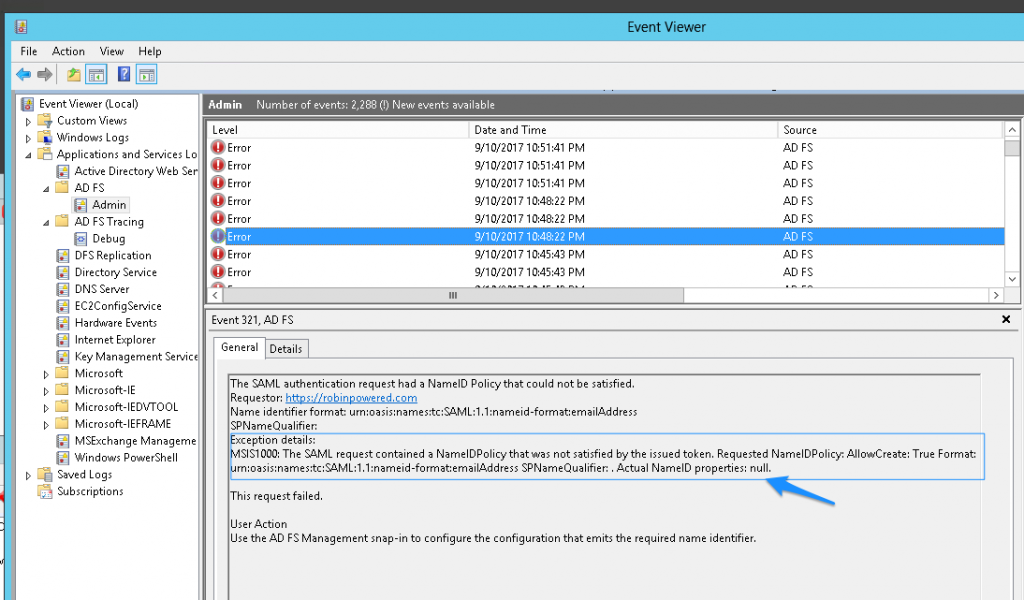
Troubleshooting InvalidNameIDPolicy
If you’ve followed these steps and still can’t log in successfully, check your Event Viewer logs in ADFS for extra information. If you see messages like “Actual NameID properties: null” in the response, it means the email address wasn’t found with the attribute mapping above.
Depending on your configuration, you may need to change the “Incoming claim type” to Windows account name. The NameID is a required field, and InvalidNameIDPolicy errors generally mean ADFS is unable to find a matching field for “Email”.